🔹 Contents
- 🔹 Step 1: Subscription
- 🔹 Step 2: Applications (VPN Clients)
- 🔹Setting up the Hiddify VPN Client
- 🔹Setting up the Happ VPN Client
- 🔹Setting up the VPN Client for Android TV, Google TV, Apple TV
🔹 Step 1: Subscription
1.1 After purchasing a product, you will receive a link by email that looks like:
https://sub.prox......By following this link, you can track your subscription statistics: its validity period, used traffic (in gigabytes), and other useful information.
1.2 The subscription must be periodically updated (this is free) to receive the latest VPN configurations from our server. You should also update your subscription if any of the server locations become unavailable. For more details about updating your subscription, see the “Applications (VPN Clients)” section.
1.3 All necessary information about changes on our servers and the need to update your subscription can be found in our Telegram channel.
🔹 Step 2: Applications (VPN Clients)
🔹 Hiddify
✅ Tip: The VPN client Hiddify settings below apply equally to Windows and other platforms (Linux, macOS, Android, iOS).
- Download the client from the official GitHub repository.
- We recommend the Portable version (just unpack and run).
- If you need an installer, select the Setup Latest version.
- Run the Hiddify client as administrator.
- Go to the "Configuration Parameters" section and configure:
- REGION: select OTHER (or RUSSIA).
- OPERATION MODE: select VPN (Experimental).
- Connection check URL: http://cp.cloudflare.com.
⚠️ Important: If you select RUSSIA, access to all sites in the .RU and .РФ domains, as well as VK and Yandex services, will be direct, without using a VPN.⚠️ Important: When VPN (Experimental) mode is selected, Hiddify will work not only in your browser but also in any running application. - Copy the subscription link, then in Hiddify click "New Profile" → "Add from Clipboard" → "Connect".
- Periodically (every 2–5 days), update the subscription in Hiddify to receive the latest VPN configurations from our server. To do this, press the corresponding button on the app's main screen.

If you encounter connection problems in Hiddify:
- a) Go to the Configuration Parameters tab.
- b) Find the Direct DNS item and set it to 9.9.9.9, then connect to the server.
- c) If the problem persists, try the following:
- https://9.9.9.9/dns-query
- https://8.8.8.8/dns-query
🔹 Happ
⚠️ Important: The Happ app is recommended primarily for mobile devices (Android, iOS) and Android TV. The version for PC (Windows/macOS) is in alpha testing and may be unstable.
- Download the Happ app from the official website: https://www.happ.su/main/ru.
- Install the app on your device and launch it.
- Copy the subscription link, then in Happ tap "Paste" (button in bottom left corner).
- In the top left corner, tap the "Gear" icon and go to the "Advanced Settings" → "Ping" section, then choose "TCP" as the parameter.
- Update your subscription in Happ periodically (every 2–5 days) to get the latest VPN configurations from our server. To do so, press the appropriate button on the main app screen or set up automatic updates in settings.
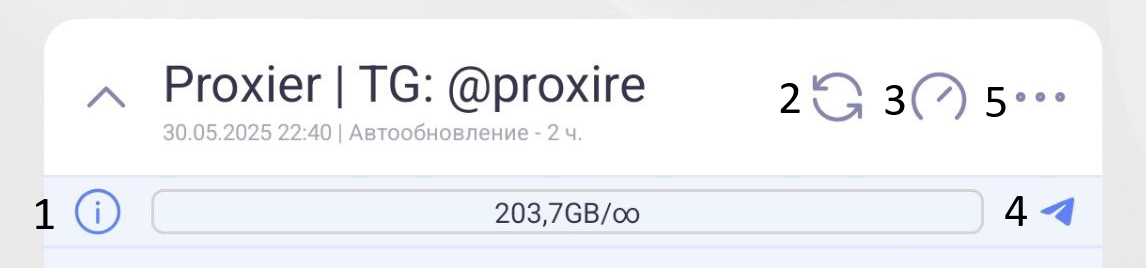
- 1. Web page of your subscription with all necessary information.
- 2. Subscription update button.
- 3. Ping test to servers.
- 4. Quick link to contact our technical support in Telegram.
- 5. Advanced subscription and client settings.